

PPCers are always trying to find what best resonates with customers through our ads and targeting strategies. The AdWords Editor allows you to speed up the editing process for ads or copy and makes managing accounts more maintainable. If you’re new to Google AdWords, this step-by-step guide on how to copy a campaign and update ads in bulk will give tools you need to make your life easier.
Example: I have a new product line and want to copy and update an existing campaign because it already hosts all the keywords I need to target – I only need to change the product name:
- Find Client Account > Get Recent Changes > Basic (Faster) >All Campaigns > Ok
This will download any changes you have made to account since last using editor
- Find Old Campaign> Be on the Campaign Level > Click on the Campaign > Ctrl C > Ctrl V
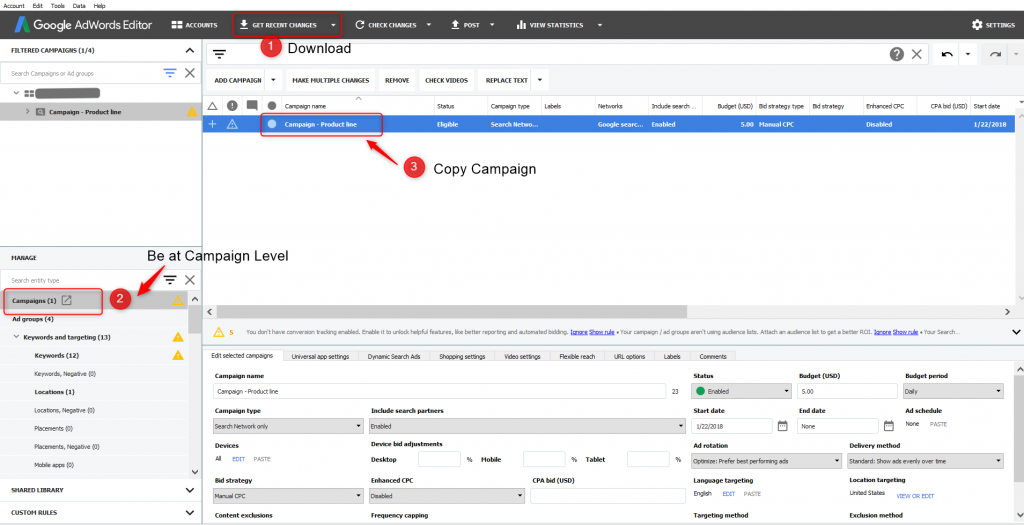
Once the “new” campaign is copied, update the campaign name
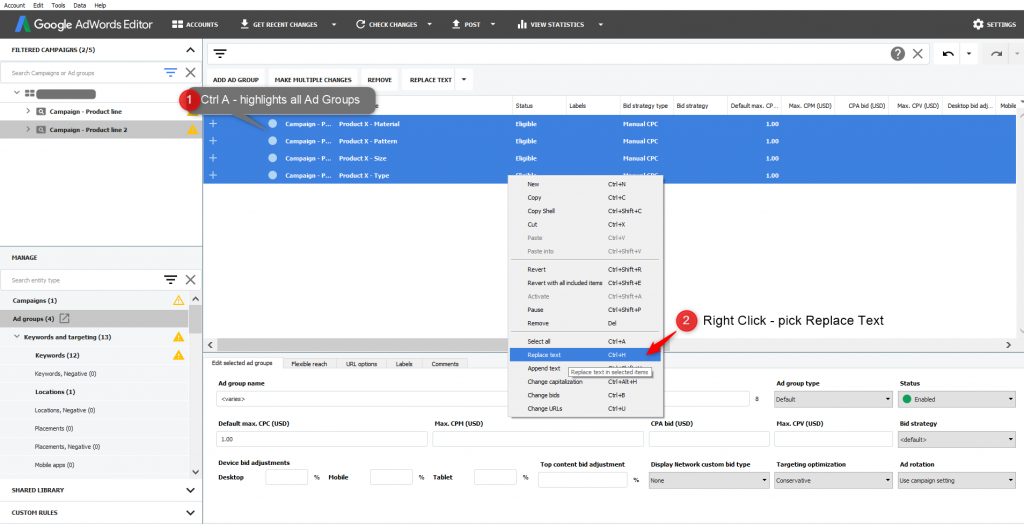
- Ad Group level of Copied Campaign > Ctrl-A (this will highlight all the ad groups)
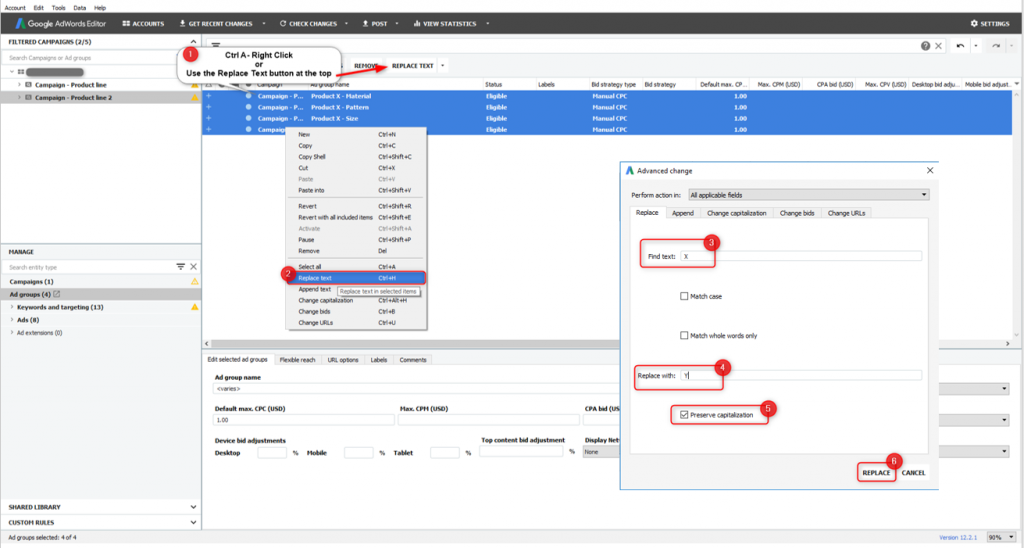
- Right click > Replace Text > Find text (type in old product name) > Replace with (new product name) > Hit Replace
Note: you’ll need to do this at the keyword level as well and be sure to double check any keywords that are broad match modifiers. Sometimes the + sign doesn’t get appended if your new keyword is two words versus only one word
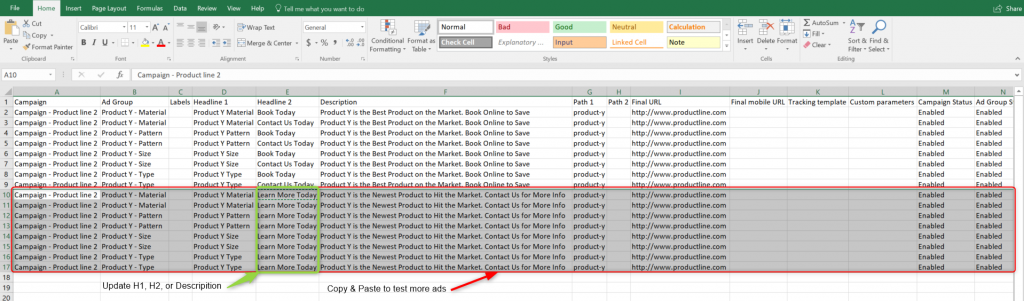
- Ads level > Copy & Paste old ads that need updating > Pause old ads > Repeat step 4 on copied ads if you just need a quick update to H1, H2, or the description
However, if your looking to update your ads then we will need to go a few steps deeper
Exporting and Importing Ads
After you’ve created the campaign and updated both ad group and keywords, you are now ready to update the ads with new copy.
- Ads Level > Account > Export > Export Current View
If you plan to use this method more make sure to check off the box on the pop up window after you save the file that says “Open File When Export Is Complete” (in the bottom left corner)
- Open file > Update H1, H2, description or copy ads > After your done updating > Ctrl C (to everything) > Go to Editor
Note: if you have any labels make sure to delete before importing
Exporting
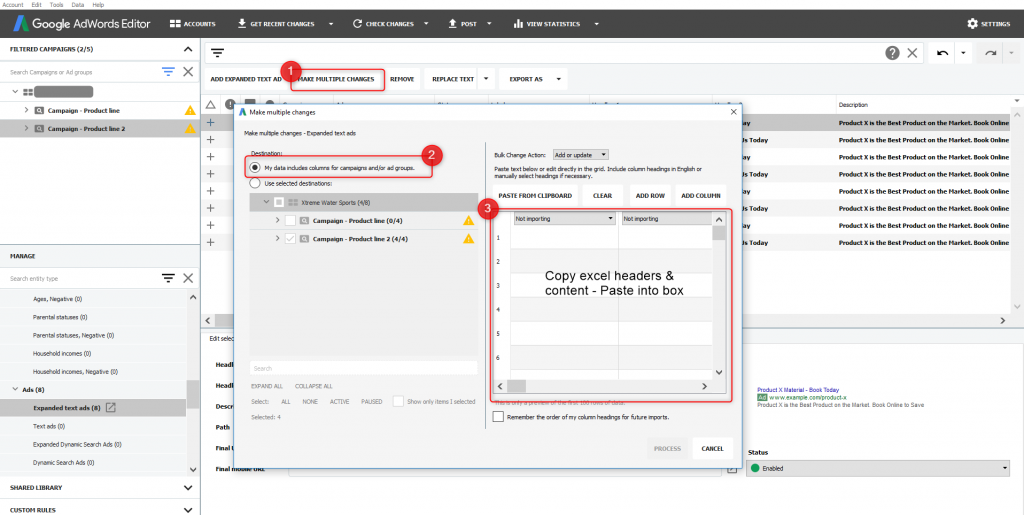
- Ads level > Make Multiple Changes > Check off – My Data Includes Columns For Campaigns and/or Ad Groups > Ctrl V (the excel file you copied) > Paste in the Blank Field (step #3 in the screenshot) > Hit Process
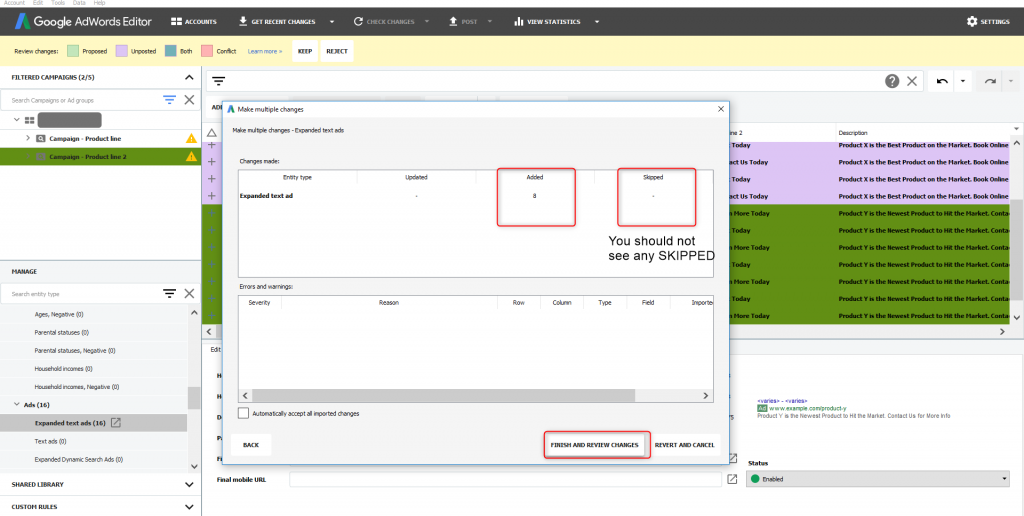
- Status/Upload box > All Ads should be in the ADDED column > Click Finish and Review Changes > Add labels if necessary
If you see some that were SKIPPED you may need to go back and find where the duplicates are
Hopefully, this step by step guide helps to clarify bulk editing ads while giving you some new skills for AdWords Editor.